12.02.2011

Is your bathroom a bologna sandwich?


Yesterday Steve and I were catching up like we do most evenings.  I was telling him of my frustration with an architect in my firm who was perfectly content to have a wall-hung sink in a public toilet.  As a designer, I'm not okay with this.  And not because I'm an interior designer, but because I'm a designer and no designer would be okay with this. 

Friends, you'll find that though colleges went through similar schools, were trained to think in similar ways, and are working in the same place, people are still people.  And people have different priorities from each other.  I had an illusion that the design field was one of idealists whom all strove for the same goal as me, to bring design to the public to make their lives better.  This, sadly, isn't true.  There are people in my field, who like every other field, just go with the motions.  They are perfectly content to do things as they always have.  Perfectly content to not ask questions.  They think a wall-hung sink in a little clinic is no big deal.  But it is a big deal and I'll tell you why. 

As Steve puts it, you can have a piece of bologna smacked between two pieces of wonder bread white and call it a sandwich, or you can have shredded turkey, cranberry chutney, walnuts, fresh baby greens, and brie delicately placed on a freshly baked baguette.  There is a difference, and people know it. 

Whether or not you could cook something or design something better yourself is inconsequential. People know good food when they eat it and they know good design when they see it.  That's why people loved Julia Child and now Jamie Oliver.  That's why they bought iPods instead of what the other guy was selling.  People like Julia Child, Jamie Oliver, and Steve Jobs didn't invent what they were selling, they made it better. 

They showed the world how good a simple braised chicken could be.  How making the interface between you and a machine more simple, could make your life easier.  While I'm not going to start a food or technology revolution, or even a design revolution, with one bathroom in one urgent care clinic.  I am going to make someones life a bit more comfortable in a stressful time when either they or a loved one is not feeling well.  Little things go a long way to make someones life better. 

Think of how you can actually taste the difference when the person cooking truly cares about what they are making.  Think of the time the sales person made your shopping experience delightful instead of just another errand because they actually wanted to help you.  Think of the time you stepped into a space and said, wow, this is beautiful.  Now think of how amazing this world would be if everyone followed their passion and did what they loved.  No more going through the motions.  No more mediocrity.  No more melancholy.  And no more bologna sandwiches. 

12.05.2010

Give A Little Bit Of Your Love

Shopping may be the least fun part of the holidays, but seeing your loved one's face when they open a thoughtful gift is the best.  Here are some gift ideas that Haus recommends.


  1 | The Creative Family, Amanda Blake Soule
  2 | A Long Piece of String, William Wondriska
  3 | Pioneers, Phaidon
  4 | The Competition Bicycle, Jan Heine
  5 | At Home, Bill Bryson
{all books can be found on Amazon, but I encourage you to shop locally if possible}


  1 | Safe Radio {$59.99}
  2 | Bird Bottle Opener {$25}
  3 | Ringpoem Napkin Rings {starting at $6}
  4 | 32oz Carafe {$24}
  5 | Apple TV {$99}
  6 | Baggu Bags {starting at $3}
  7 | Ikat Mini-bowls {$8 each}
  8 | Pebble Placemat & Coaster {$6 each | $14 | set of 3}
  9 | 8oz Carafe {$36 | set of 3}
10 | Tea Set {$16 - 48}
12 | Canole Carousel {$80}
13 | Tomato Blanket {$25}

  
  1 | Pencil Case {$14}
  2 | Feild Notes Pencils {$3.49 | set of 6}
  3 | iPhone 4 Skin {$25}
  4 | iPad Stand {$25}
  5 | Field Notes NotepadLeather Cover {$9.95 | set of 3; $22}
  6 | Wastepaper Basket {$55}
  7 | Fisher Space Pen {$22}


  1 | Bracelet {$85}
  2 | Serif Tote {$26}
  3 | Classic Pajamas {$69.50}
  4 | Ballet Slippers {$55}
  6 | Ring {$45}
  7 | Kashmir Scarf {$59}
  8 | Necklace {$150}


  1 | Bike Bell {$20}
  2 | Wood Wristwatch {$75}
  3 | Brooks Bike Saddle {starting at $60}
  4 | Classic Shaving Kit {$150}
  5 | Donegal Hat {$62}
  6 | Vintage Bowtie {$65}
  7 | Dopp Kit {$95}
  8 | Ray-Ban Aviators {$139}
  9 | Wooden Flashlight {$48}
10 | Stanley Flask {$22}


  1 | Wood Catapult {$27}
  2 | Peasant Hat {$24}
  3 | Hair Clips {$6.50 each}
  5 | Animal Blanket {$25}
  6 | Art Dough {$9}
  7 | Log Cabin {$22}
  8 | Mask & Tail Set {$48 | set of 8}
  9 | Robot Placemats {$14.95}
10 | Rock Crayons {$5.50}
11 | Hero Mask {$15}
12 | Wooden Blocks {$38}
14 | Puppet {$32}


*The best kind of giving is charitable.  Donate your time to a local shelter, food bank, Salvation Army or soup kitchen.  Check out the links below for more charitable giving on a global scale.

  1|  Heifer International donates animals and seeds to bring people out of poverty throughout the world
  2 | The World Wildlife Fund protects habitat and threatened animals
  3 | The ASPCA prevents cruelty to animals 
  4 | Engineers Without Borders builds a better world and has over 350 projects in over 45 developing countries around the world (including America).  They bring water, renewable energy and sanitation to areas fostering a better condition of life to those in need.
  5 | Oxfam International is a confederation of 14 organizations working together in 99 countries and with partners and allies around the world to find lasting solutions to poverty and injustice. 
 6 | The United Nations World Food Program provides food and farming education to people in developing countries in an effort to end world hunger.  You can make a huge difference in the life of a child just by purchasing this super cute bag.

11.13.2010

Shower The People With Love

Recently one of my best buds decided to say "yes" to marrying the perfect man for her.  We couldn't be happier for them and I couldn't be more excited about the idea of throwing her a fantastic shower.  I have weddings back on the brain after a four year hiatus and I can't get enough!  I forgot how exciting and fun it is to plan.  There are so many beautiful and unique things people incorporate into their special of day, and all of them are so inspiring. For the time being, I'm totally letting myself get carried away by love, romance, and stationary.  Yup.  Stationary.  

This shower is not good for me.  It only feeds my addiction.  I love paper so much I can't even tell you.  I have more cards than I will ever send, more paper and ribbons than I could use, and I want more. all. the. time.  As my addiction grows, all internet searches have been to find inspiration for the best damn bridal shower invitation you've ever seen.


I am not the type to just buy something at Target or online, even though they may be fantastic.  Nope.  I must design it myself.  And if my dreams come true, have it letter press printed.  A good invitation let's you know who, where, and when.  But a great invitation tells you about the tone and level of formality of the party.  It gives you expectations of what is to come.  The best show you the character of the guest{s} of honor.  This is why no ordinary invitation will due because not many people in our lives are ordinary.

     VS
I have the tendency to get a little fancy.  I'm like petit fours, too fussy for the tiniest tasty bite.  But my friend is like milk and warm chocolate chip cookies.  Cozy, comforting, down to earth, a classic all American treat.  She's not pink, she's blue.  Sure she likes to be girly, but loves her North Face fleece and sneakers more than anyone I've ever known.  She likes things simple, elegant, and modern.  I want this shower to be all about her, as it should be.  I want her to feel surrounded by love.  I want her {and all the guests} to feel completely comfortable and at home.  The invitation, decorations, food, and location all play into this.  This is one an invitation {and party} design challenge I'm totally up for.

The lady of honor is an architect and yoga instructor.  Like all American women, she loves anything French.  I love the idea of taking a form, like the quatrefoil, that is all at once architectural, Eastern, Western, ancient, and modern, and incorporating it into the invites.
This has the quatrefoil, but it's too fancy.  Still . . . I'm a sucker for envelope liners.
The Bride and Groom were engaged at the lovely Lied Lodge.  Maybe a faux bois theme on the Sunset Terrace overlooking the hazelnut fields?
I could give little trees as favors from the Arbor Day Foundation!
These people totally get it.  This is perhaps the best invitation I've ever seen.  They made a video!    
Frendzies Kev & Carrie get it too.  This is another wedding I can't wait to go to! :)  
I love the organization of space and text in this example.  You can tell, this party is going to rock. :P
Love, love, love the graphic style of the date.
This would be a great invitation to an A,B,C shower where each guest is assigned a letter of the alphabet that their gift must start with.

Have great ideas of your own to share?  Leave them in the comments :)

11.06.2010

Take It EZ . . . Leave It Level

Installing your own cabinets can be a challenge if you level the traditional way with shims and do not have a laser level.  It would also really suck if you didn't have someone who had some clue what to do.  Luckily we had such a person in a one Papa Dish who happens to own a laser level and who also brought us the most wonderful invention since the bucket or the hyde scraper . . . EZ levelers.  

The EZ Leveling system is something I had never heard of that Papa Dish found randomly on the magical world of the internet.  It is truly amazing!  I will never put another cabinet in without them.  Especially in an old haus with uneven flooring.  The extra beauty of the system is you never see any evidence of it once the cabinets are in place and the toe kick is on.  Genius!  {gotta love a contractor that actually cares about the finished look}  Way more expensive than shims, but totally worth it as they literally saved our kitchen.  More about that later.  I'll leave the explanation to the experts on the website.  They do a much better job at explaining how these little guys work then I ever could.

The other amazing-wonderful-love them forever thing the same people have done is put how-to videos on YouTube.  After watching them, I swear anyone could put in cabinets.  I'm proof.

Tip #1: You will want a tripod to place that lovely self-leveling laser on. 


When you install cabinets you begin at the top with the upper cabinets then work your way down to the lowers.  This is so the lowers aren't in your way for the upper cabinets.  Makes sense.  No matter if you are doing uppers or lowers, you start in the corner {if you have one}  In our case we didn't have upper cabinets over our lower cabinets so our order didn't matter. 
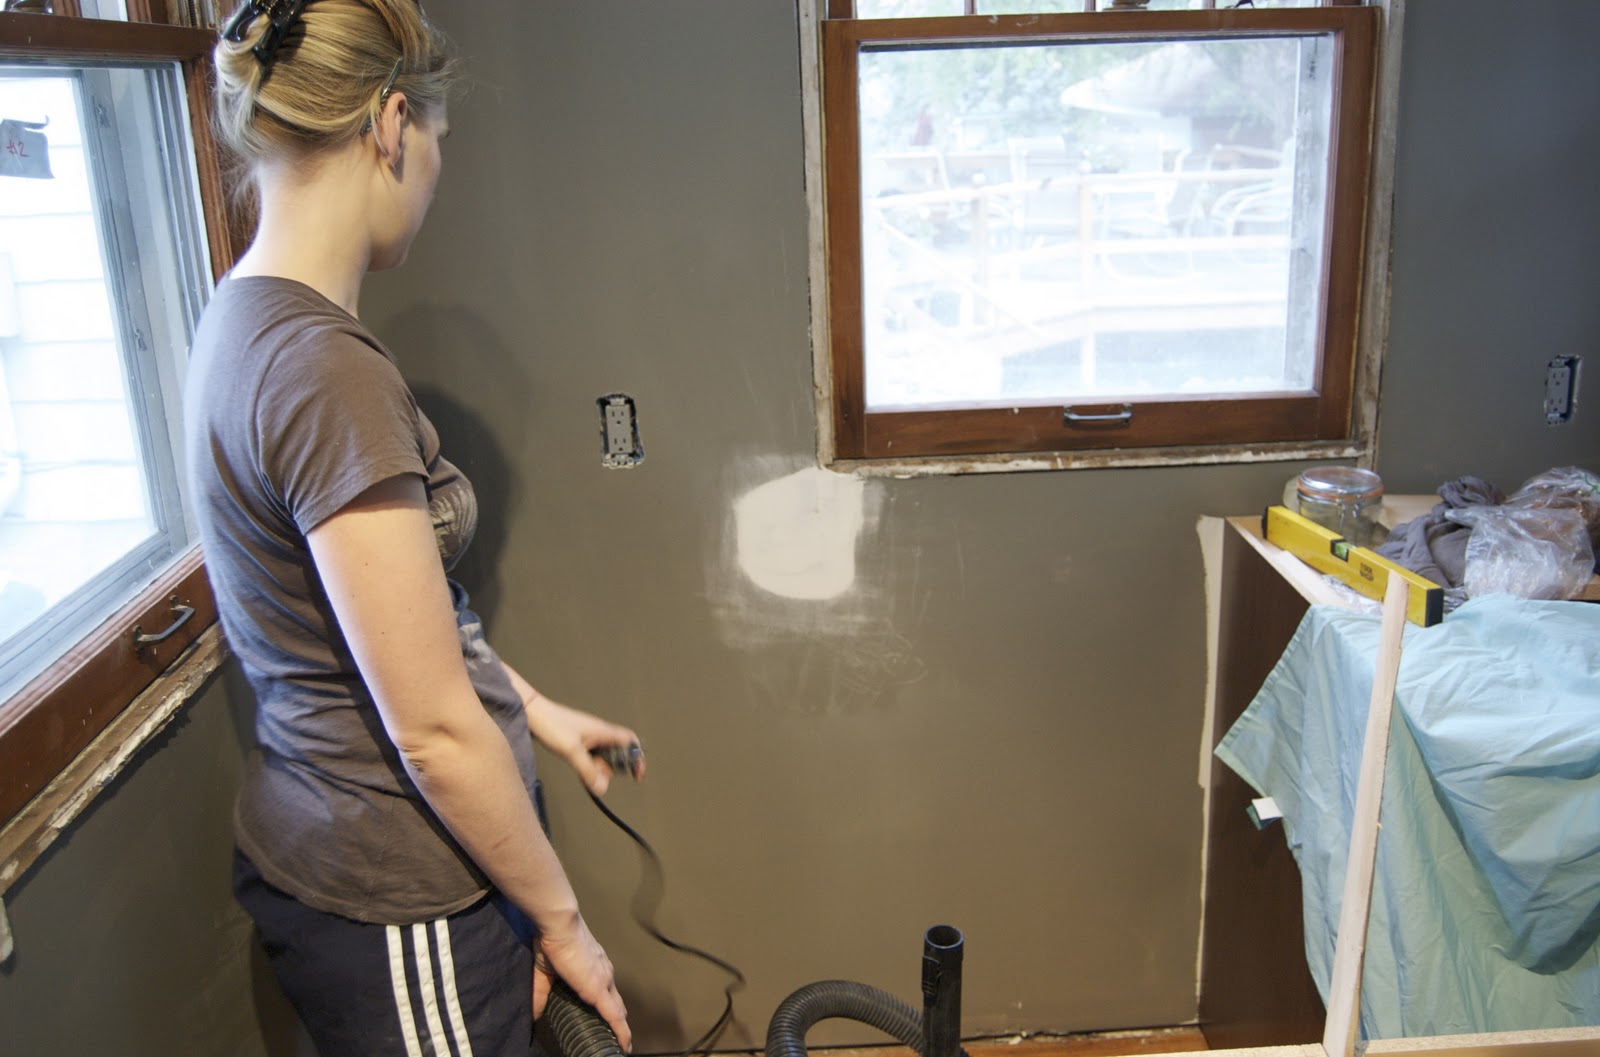
Before all this though, you want to find the lowest part of your floor {our back corner}.  Following the YouTube instructions, use the laser to mark the line you will level your cabinets to.  You would want to follow this step if you are using shims as well.  At the same time, you want to mark where your studs are.  You would think, considering the fact that we had just seen them too long ago, we would know where our studs were, but not so much.  Our haus' studs where mostly 18" OC, but not always.  Our trick {because the stud finder sucked} a tiny little picture frame nail.  Tapping it in to see where your studs are is cheaper than a stud finder anyway {if you do it below your level line, no one will ever see the holes you put all over your new walls}  Next, if you are doing it our way you need to put the EZ Levels in the base of your cabinets.   

Tip #2:  The screws that come with the system to attach the levelers to your base cabinets are a wee bit short.  Some of our levelers came off while adjusting their height.  Not cool and unnecessarily stressful.  Unless they've changed this since we ordered our set, replace the screws with longer guys and save yourself some heartache.  
Steve drilling the holes for the EZ Levels
Placing said EZ Level
You will also want to use a stain marker, that matches your wood most closely, on the edges of your cabinets.  All wood shrinks and expands, and whether or not the cabinets ever do shrink you would see a nice white line where they meet without doing this.  Plus, you're going to want a marker anyway to fix the occasional nick and scratch that all kitchens acquire.
Now you'll want to put your cabinets in place.  With the system we used, you connect the cabinets together first {just in the front!}, then place them against the wall, then level them to your laser line.  I don't know how it works with shims, look that up on some other blog.  :P  Once your cabinets are level, you can completely connect the cabinets together using shims.  You can also shim them in the back following the line you marked at the stud and screw them into the wall.  Again, this is all explained more clearly on the videos.    

Tip #3: This is on the videos as well, but when you screw the front of your cabinets together, do this right above or below the screw where the hinge attaches.  This way, they are hidden once the doors are on.  Seriously, I love this guy!
Unfortunately we didn't take any photos of us installing the pantry section.  This was probably the most difficult to do as far as phasing goes.  We have a panel that encloses our refrigerator, upper cabinets above the fridge, a pantry beside that, and a little low cabinet between the fridge and the window.  All of these things needed to fit just so, so we didn't have any gaps.  We started with the low cabinet because this was in the corner.  Then we put the panel up temporarily to mark where the uppers began.  After the upper cabinets were installed we put in the pantry.  The line on the wall next to the pantry is where trim around a door will go.  Yay!  Everything fits!    
Well . . . almost everything.  Do you see the fan where a cabinet should be in the picture above?  Yup, that cabinet didn't fit.  We made one of the easiest and dumbest mistakes you can when ordering our casework.  {I blame the Menard's guy} We didn't leave any space for a filler panel against the wall.  No walls are ever perfectly square.  I don't care if you have a new haus.  They aren't.  Luckily we were not too far off from making it work so we were able to plane both sides of the cabinet and the one next to it down rather than ordering new. When I say "we" I mean Kevin with ShadowBrook came and planed down our cabinets.  Kevin also cut down our enclosing panel to be flush with the face of the upper cabinets.  Kevin is very talented, but good luck trying to get him.  He owns a farm and a creamery.  He's a busy guy.
Oh, yeah, I almost forgot.  After all that, the cabinet still wasn't flush to the face of the corner cabinet when we put it in place.  The reason, we discovered, was a nice little bump on the wall.  We're not sure what happened here, if the mudder was a little over zealous, but we ended up sanding the wall down to the tape.  Then after cussing and banging on the cabinet to make it go in {clamp it!  clamp it!"} all was in place, flush and lovely. {PS: even after this, I still love Dallman Drywall}

This major mistake of ours was a complete pain in the tukhus but not having any filler strips makes our cabinets look like they were custom built for our kitchen.  Although I absolutely love this, its not a mistake I would make again hoping it would turn out as well the second time around. 

11.04.2010

Be Nice To Your Mudder

There are some things you just shouldn't do yourself. Like your own dental work.  Or giving yourself a tattoo. For me, drywall is one of those things. I wouldn't really have a clue what I'm doing and it's way too easy to do a really bad job. We know our limits or are slowly learning them here at the haus, so we called in the experts for this part of construction. The crew we hired was not the least expensive, but they were fast, professional, tidy, and truly skilled craftsman. 

The way Dallman works, as well as most other installers, is in separate crews that specialize in one phase of the work.  The first crew the "rockers" measure, cut and hang the raw gypsum board. This is {in my mind} the only part someone with no experience could probably handle. Although it's like weight lifting, don't do it alone because you're just not that strong. Gyp. is heavy and requires at least one extra buddy, more likely two. This is not to say hiring this part out wasn't worth it. A good rocker is quick, yet precise, making it easier for the "mudder" to do his/her job. Our crew of five were done with the entire kitchen in about 45min. This would have taken us at least a full weekend plus the work of conning someone to be our extra special buddy.
rocking in the not so free world

The next crew the "mudders" come in next and well . . . mud. They cover all screw holes, make seams disappear and corners actually square. This is the part that seems to require the most talent and the area that determines a good drywall job from a bad one. Mudding our kitchen was a two, half-day job for a crew of two guys.  This is the part worth paying for and I cannot sing their praises enough.  We had this very bizarre {yet for some reason not unusual condition} in our haus where a previous owner decided to put in a new gyp ceiling . . . over the plaster.  WHY!?!  

Time out for Rants in the Pants:  The thing that drives me most crazy about our haus is the fact that previous owners didn't take the time to do things right the first time.  I'm all for home renovation {obviously} and for doing it yourself if you can.  But if you don't know what you're doing, or you're going to be lazy about it, just buy new construction and save the rest of us a lot of heartache.  Please.    

When we took down the plaster on the walls we were left with a 1 1/2" gap where the ceiling hung lower than the walls.  This is hard to explain, so hopefully you can see it in the pictures.  We were certain that we were going to need crown molding to hide this, but our mudders came to the rescue and made the seams absolutely perfect!  Seriously, have I said that I love them yet?  Because I love them!  :)  

mudded and sanded

Next the "sanders" came and smoothed it all out. The highest level of finish in drywall work is a 5.  I didn't specify this in our contract, but I'm pretty sure that's what we got, or pretty close to it. Our walls were so well done that it was well worth the cost.  

Nothing goes perfectly though, and there are a few things people converting from plaster to gyp need to know:

1}  Plaster is thicker than gyp.  This means 
        a.  Your window and door casings will be an issue.  They will stick
        out farther than the drywall now.  This means putting trim on will
        be a bit of an issue later.  This is something we are still trying to
        figure out how to deal with so I will take any suggestions you have.  
        b.  You may need some new flooring around the perimeter because
        your baseboard will no longer be where it was.

2}  1/2" gyp is standard on exterior walls.  You should be using this if you are DIYing it and you should plan locations of your electrical boxes accordingly.  Meaning do not nail them the standard 1/4" out from the face of the stud, but 1/2" so that your new walls will be flush with the boxes.  
*FYI: add an extra 1/8" or so to this if you are putting tile on that brand-spanking new wall of yours.  Otherwise you'll have to be like us and buy box-extenders, and washers, and all kinds of bits and bobs that make your outlets actually accessible.

3} Bring the sheet back out.  You do remember tip number #2 from this post don't you?  Of course you do!

primed time